This article was prepared with AI assistance using the application source code. If anything is inaccurate, or you have a clearer method, please suggest a correction through this page's feedback.
Quick recolor & similar recipes
Open Color Adjustment after generating a preview. The quick recolor card is on the right. Select the part of the image you want to change, then choose a target color or a similar material recipe. Changes apply to the selection; you do not have to replace every occurrence of the same color.
Checked against the source code available on October 19, 2026.
Select the area to change
| Tool | What it selects |
|---|---|
| Same color | Every region with the clicked color |
| Similar colors | Visible regions within the color-difference tolerance |
| Pick blocks | Individual regions, selected or deselected one at a time |
| Selection brush | The area covered by your brush strokes |
You can inspect target colors and recipes without a selection, but cannot apply a recommendation until an area is selected.
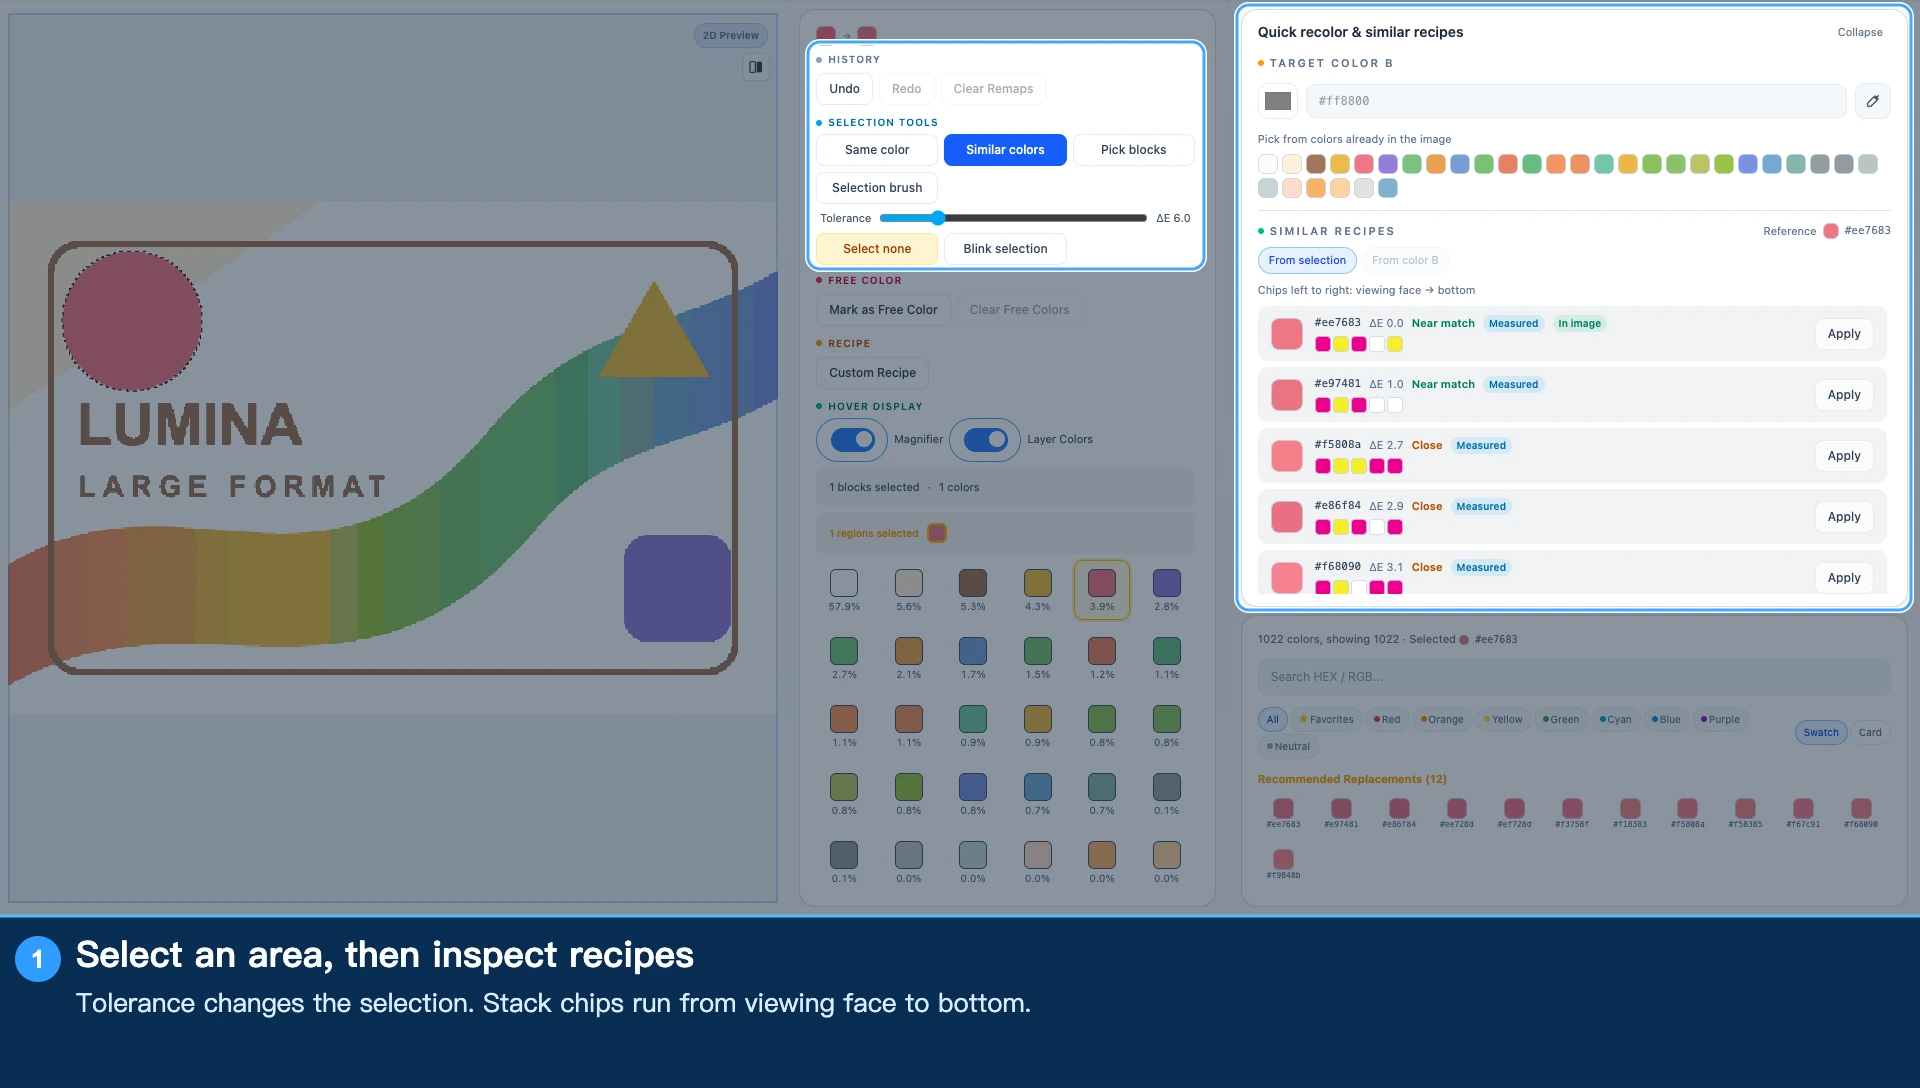
Similar-color tolerance
The tolerance uses ΔE00, a measure of perceived color difference. A higher value includes a wider range of colors.
- The default is 6. The slider runs from 0 to 30 in steps of 0.5.
- At 0, only regions with exactly the clicked color are selected.
- Increasing it can include nearby shades, including a background or neighboring color you intended to keep.
- Clicking the same color again toggles the corresponding selection.
Tolerance changes the selection, not the image colors. Check the selection boundary before recoloring.
Set target color B
Enter a six-digit HEX value such as #ff8800, use the color picker, or choose a color already in the image. With a LUT source, Lumina finds a printable color close to B. With a material archive, B becomes the replacement target, while the stack is still calculated from the current materials and recipes.
A HEX value does not guarantee that your filaments can reproduce it exactly. Confirm the selection and target, click Replace selection with this color, and wait for the preview to update. Check an unselected area as well to confirm that the change stayed within the intended region.
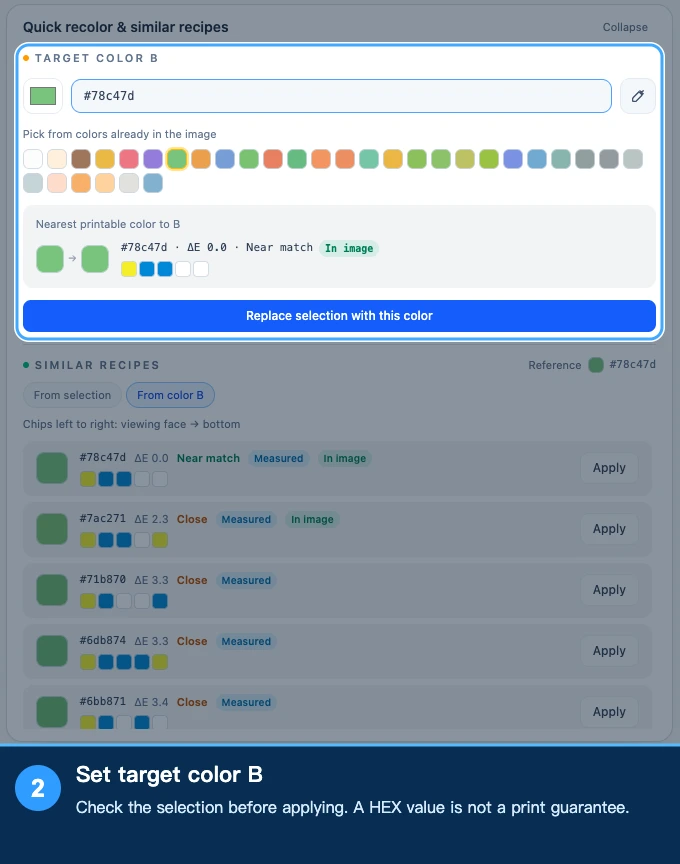
Pick a color from the image
Click Pick from image, then click the image on the left. The currently displayed print color at that point is copied to B without changing the existing selection. Press Esc or collapse the card to leave eyedropper mode.
Choose a similar recipe
Choose From selection or From color B as the reference. If the selection contains several colors, choose one as the reference.
- Measured: an existing LUT entry.
- Predicted: an estimate from an available prediction model; verify the printed result.
- In image: the image already uses this color. This is not an accuracy rating.
Stack swatches run from the viewing face on the left to the bottom on the right. Check the color difference and layer stack before clicking Apply. With a material archive, the list uses colors already in the current image and their actual stacks, rather than every possible material combination.
Check and save the result
Wait for the 2D and 3D previews to update. Undo if necessary. If applying a recipe rebuilds the selection, select the area again before continuing. Before generation, inspect the changed areas and layer materials, and save the project.
An empty list can mean that the current source has no available entries. If loading fails, follow the message and regenerate the preview. Recheck recommendations whenever you change materials or color source.
Related: Selection modes, palette & free colors, Custom recipes.
Submit feedback
Your feedback is sent privately to the Wiki maintainers and is not displayed publicly on this page.